Aluminium Window Glazing Replacement QA: Handling, Setting, Seals and Final Inspection
MC
Author
2026-11-05
Published
12 min read
Reading time
Aluminium Window Glazing Replacement QA: Handling, Setting, Seals and Final Inspection
Replacing glazing in an aluminium window is a controlled installation task, not simply a matter of lifting out one pane and inserting another. The replacement must be identified, transported, supported, sealed and retained in a way that suits the complete window assembly. A sound quality-assurance process therefore follows the glass from delivery through final inspection and records what was checked at each stage. This article provides a practical, general checklist for builders, installers, supervisors, facilities teams and owners. It does not replace the project documents, the window manufacturer’s instructions, the glass supplier’s instructions, or advice from a suitably qualified professional.
The central principle is compatibility. Glass, setting materials, gaskets, beads, sealants, drainage paths, aluminium profiles and hardware work as a system. A visually neat replacement can still be unsuitable if the glass type is wrong, an edge is damaged, a support is missing, a gasket is stretched, a bead is forced into place, or a sealant is incompatible with the surrounding materials. Quality assurance should look for those less visible issues as carefully as it looks for scratches and fingerprints.
Before work starts: establish the replacement brief
Begin with the approved replacement brief. It should identify the opening, the window or door system, the glass configuration, the required safety treatment where applicable, the visible orientation, the retention method and the installation sequence. Drawings, schedules, purchase records, site instructions and the existing unit can all provide useful evidence, but they should not be treated as interchangeable sources when they conflict. Resolve discrepancies before the old glazing is removed.
The brief should also state who is responsible for confirming measurements and who is responsible for approving any proposed substitution. A replacement that appears close in appearance may differ in thickness, mass, coating, edge treatment or safety characteristics. Do not infer a specification from a label, colour or reflection alone. If the specification cannot be established with confidence, pause the installation and obtain written confirmation from the responsible designer, manufacturer, supplier or building professional.
Delivery and handling records
Record the delivery condition before moving the glass into the work area. Check the delivery docket or identification label against the project information, then inspect accessible edges, corners and faces for chips, cracks, impact marks, deep scratches, coating damage, contamination and signs of moisture trapped in an insulating glass unit. A small edge defect can become a failure during handling or service, so it should be reported rather than hidden by a gasket or bead.
Use the supplier’s handling instructions and the site’s safe-work procedures. Glass should be carried with suitable equipment and enough people for the size, weight and route involved. Keep hands, suction equipment and lifting points clean. Do not drag a pane across concrete, metal, grit or an unprotected sill. Do not place glass directly on a hard floor or lean it where an edge can be struck by tools, frames, vehicles or passing workers.
Store the unit upright in a stable, protected rack or support arrangement appropriate to the product. Separate units so they cannot rub, slide or impact one another. Protect them from construction debris, welding spatter, mortar, solvents and uncontrolled weather exposure. Do not store a unit in a position that puts pressure on a corner or creates a twist. Keep labels and protective markings available until identification has been checked and the work is complete.
Glass identification and traceability
Glass identification is a QA hold point. Confirm the unit’s location, pane count where relevant, surface orientation, safety marking where required, coating or visual specification, and any supplier or batch information that the project requires. For an insulating glass unit, check that the spacer, seal edge and identification correspond with the approved order. For laminated or treated glass, confirm the product designation from reliable documentation rather than relying on appearance.
Identification marks may be present on the glass, spacer, label, packaging or accompanying documentation. Record what was actually observed. If an identification mark is absent, unclear or inconsistent, do not create a description from memory. Photograph the condition where permitted by the project procedures and escalate the uncertainty. Traceability is most useful when it records the installed unit, not just the carton in which it arrived.
Safety glazing considerations
Where the location, use or design creates a risk of human impact, confirm the safety glazing requirements that apply to the project. The relevant selection and installation provisions should be checked against AS 1288 and the applicable National Construction Code requirements in Australia. AS 2208 is a relevant reference for safety glazing materials. The exact treatment depends on the opening, its dimensions and configuration, the surrounding construction and the use of the building. This article does not assign a safety category or certify any pane.
Do not assume that a pane is safety glass because it is thick, tinted, laminated-looking or marked with a familiar symbol. Do not remove a required marking during cleaning or finishing. If the replacement is intended to serve a safety-glazing function, retain the available evidence of product identity and installation. Where a local authority, certifier, designer or manufacturer requires a particular record, include it in the handover file.
Prepare the aluminium frame and work area
Before removing existing glazing, protect adjacent finishes and establish a controlled work zone. Keep tools, blades, wedges and replacement materials organised so they cannot fall into drainage channels or damage the frame. Check access, lighting and weather conditions. Wet, windy or contaminated conditions can affect handling and sealant work. Follow the site risk assessment for broken glass, sharp edges, work at height and temporary opening protection.
After removal, inspect the frame rather than treating it as an automatically reusable component. Look for distortion, corrosion, cracks, pulled fasteners, damaged glazing rebates, blocked drainage openings, old sealant residue, hardened or torn gaskets and missing beads. Check that the frame remains compatible with the replacement unit and that the retention method can be restored without forcing components. If the frame is bent or the drainage path is compromised, a glass-only replacement may not be an adequate repair.
Clean the glazing rebate with methods that are safe for the aluminium finish, gaskets and any retained coatings. Remove loose debris and old materials without gouging the profile. Do not use an unapproved solvent on a gasket or coated surface. Keep the rebate dry and free of dust immediately before installing the replacement. A clean contact surface helps inspection; it does not make an incompatible sealant or damaged frame acceptable.
Setting blocks as a concept
Setting blocks are support components placed between the glass and the frame in accordance with the system design. Their purpose is to support and position the unit while helping keep glass edges and faces clear of damaging contact with the frame. The correct arrangement is system-specific. It depends on the window design, glass configuration, loading, movement, drainage and the manufacturer’s installation instructions.
Quality assurance should confirm that the specified blocks are present, clean, stable and located as required. They should not be improvised from loose timber, metal scraps, cardboard or an unknown soft material. Do not assume that a conveniently sized block is suitable because it appears to carry the pane. A block that can react adversely with the glass edge, coating, seal or aluminium may introduce a defect that is not immediately visible.
Setting blocks are not a substitute for perimeter clearance, a retaining bead, a gasket or a sealant joint. They should not be used to force a distorted pane into a distorted frame. They also should not block drainage paths or be placed in a way that creates point pressure. Confirm the block material, shape and location against the approved system information. Where that information is unavailable, obtain a decision from the responsible technical source instead of inventing a layout.
Edge clearances and movement
The glass edge must remain clear of unintended hard contact with the aluminium frame, beads, fasteners and other rigid parts. The required edge clearances and bite conditions come from the system design and applicable documentation; they should not be guessed from a general rule. Check the full perimeter, including corners, after the pane is positioned and again after the gaskets and beads are installed.
Look for evidence that the unit is pinched, twisted, sitting low on one side or touching a frame corner. Check that no sharp burr, screw head, swarf or fragment is positioned where it can bear on the glass. Do not correct a clearance problem by grinding the glass on site unless an authorised process specifically permits it. If the opening and unit do not match, stop and resolve the mismatch.
Gaskets, beads and retention
Gaskets should be the correct profile and material for the window system. Inspect them for cuts, splits, compression damage, shrinkage, contamination and loss of flexibility. Confirm that a reused gasket is actually approved for reuse; a gasket that looks intact may have lost its ability to seal or retain the glass. Replacement gaskets should be installed without stretching them around corners. Allow them to relax and settle in accordance with the supplier’s instructions.
When fitting a gasket, keep the joint location and orientation consistent with the system details. Avoid bunching, gaps, crossed corners and excessive tension. A gasket should sit evenly in its channel and make the intended contact with the glass and frame. Do not apply random adhesive, tape or sealant to hold a gasket in place unless the approved method requires it.
Beads are retention components, not decorative trims. Check that each bead is the correct length, profile and orientation, and that clips or engagement features are intact. Install beads in the sequence recommended for the system so the glass is retained without being forced. A bead that rocks, springs out, leaves a visible gap or requires excessive impact should be treated as a defect. Never hammer directly against glass or use a method that could damage the frame finish.
Sealants and interfaces
Use only a sealant approved for the particular glass, aluminium finish, gasket and exposure condition. Confirm the product identity, use-by information, preparation requirements, surface compatibility and curing instructions. Sealant selection is not based on colour alone. Some products can stain or attack coatings, release materials that affect insulating glass seals, or fail to bond to a surface that appears clean.
Prepare joints as instructed. Keep sealant away from drainage routes unless the detail specifically requires sealing there. Apply a continuous, controlled joint where the system calls for one, and tool it without smearing material across visible glass or blocking movement paths. Do not bridge a drainage opening with a casual bead of sealant. Allow curing time before loading, cleaning aggressively or carrying out any test that could disturb the joint.
Sealants do not correct an incorrectly sized pane, missing support, damaged gasket or incompatible frame. They are part of an interface detail. Record the product used, batch or expiry information where required, installer and date. If a sealant is substituted, obtain approval before application and retain the approval with the project records.
Frame compatibility and installation checks
Confirm that the replacement belongs to the correct frame family and opening. Aluminium systems can look similar while using different rebates, beads, gaskets, drainage arrangements and retention details. Check fixed lights, sashes, sliding panels, louvres and other configurations separately. A pane that fits the visible opening may not fit the internal retention geometry.
After installation, operate the window or panel gently through its normal range. Check that the sash does not scrape the glass, gasket, sill or frame; that hardware movement is not obstructed; and that locking or latching can be completed without unusual force. This is a functional check, not permission to adjust components beyond the approved instructions. If hardware adjustment changes the alignment of the glass or frame, record it and recheck the perimeter and seals.
Inspect the external and internal faces under suitable lighting. Use a consistent viewing method agreed by the project team rather than examining every mark with a magnifier and changing the acceptance standard from one pane to another. Note the location and type of any blemish, edge defect, sealant smear, coating mark or distortion. Acceptance decisions should follow the contract, manufacturer information and applicable project criteria.
Cleaning without creating damage
Remove labels, dust and temporary protection using the glass supplier’s method. Start with clean water and a clean, non-abrasive tool where appropriate. Do not scrape a dry pane with a blade, use abrasive pads, or allow cement, plaster, paint, welding residue or metal swarf to remain on the surface. Follow product instructions for coated glass and avoid chemicals that can damage gaskets, sealants or aluminium finishes.
Cleaning is also an inspection opportunity. View the glass in different natural and artificial light conditions, from inside and outside where safe. Check that the insulating glass perimeter is intact, that no moisture or debris is trapped between panes, and that the final cleaning has not removed an identification mark or safety marking that must remain visible. Record cleaning completion separately from the acceptance of the pane’s visual quality.
Final inspection checklist
A final inspection should be systematic and documented. The following sequence can be adapted to the project:
- Confirm the opening, unit identity and approved replacement information.
- Confirm the glass type, orientation, visible marking and available traceability records.
- Inspect faces, edges, corners, spacer or seal edge and coatings for damage.
- Confirm that the frame is sound, clean and free of loose debris or blocked drainage openings.
- Confirm that setting blocks and other support components are the approved type and position.
- Check edge clearances, perimeter contact and the absence of hard points or pinching.
- Check gaskets for correct profile, even seating, clean corners and no stretching or gaps.
- Check beads, clips and retention features for engagement and stability.
- Check sealant identity, continuity, adhesion, finish, curing status and drainage boundaries.
- Operate the window or panel and check hardware, alignment and safe closure.
- Clean the finished work without damaging glass, seals, coatings or frame finishes.
- Photograph or record concealed work before it is covered, where the project requires this.
- List defects, assign responsibility and record the close-out inspection.
Water and air test boundaries
A site inspection can identify visible gaps, poor sealant workmanship, blocked drainage and obvious installation defects. It cannot, by itself, establish the complete performance of a window assembly. Water penetration and air leakage depend on the opening, frame, seals, drainage, surrounding construction, exposure, test method and test conditions.
Where a water or air test is required, define the test scope before starting. Identify the test location, specimen or area, preparation, equipment, sequence, safety controls, acceptance criteria and person responsible for interpreting the result. A hose observation is not automatically equivalent to a formal performance test. Conversely, a test result for one configuration should not be presented as proof for every other configuration.
AS 2047 is a key Australian reference for windows and external glazed doors and should be considered with the project’s design, exposure and evidence requirements. Use the current applicable edition and the project’s specified test or assessment pathway. Do not invent a pressure, duration, leakage limit or rating. Record what was tested and what was not tested. A failed observation should lead to investigation of the interface and drainage detail, not an improvised sealant patch that hides the cause.
Standards, codes and New Zealand references
For Australian work, the selection and installation of glazing should be coordinated with AS 1288, the relevant provisions of AS 2208, AS 2047 where window or external door performance is in scope, and the applicable National Construction Code and Australian Building Codes Board guidance. AS 4666 may arise in broader building-envelope or insulation-related documentation; its relevance to a particular glazing replacement must be confirmed rather than assumed. Standards should be read as complete documents and applied to the project conditions, not reduced to isolated phrases.
For New Zealand work, coordinate the replacement with the New Zealand Building Code, the relevant Acceptable Solutions or verification methods, the window system documentation and applicable New Zealand glazing references. The NZS 4223 series is a commonly encountered reference family for glazing in buildings, but the applicable part, edition and project pathway must be checked for the work in question. The New Zealand context can also involve site exposure, wind, moisture management, safety and producer statements or other evidence requirements. Confirm these matters with the project’s designer, building consent authority, certifier or other responsible professional.
Australian and New Zealand references should not be mixed casually. A product document prepared for one jurisdiction may not provide the evidence required in the other. Keep the jurisdiction, edition, product configuration and installation scope clear in the QA file.
Documentation and handover
Good documentation makes the installation auditable. Retain the approved glass schedule, order or delivery identification, photographs where permitted, defect reports, approvals for substitutions, gasket and sealant details, installer records, inspection checklists and test reports. Record the date, opening reference, people involved and any limitations on inspection. If an item was inaccessible or not tested, say so plainly.
Handover information should explain routine cleaning and any restrictions on future maintenance. Identify the installed glass and the frame system without claiming a performance level that has not been evidenced. Include instructions for reporting cracks, seal failure, water entry, difficult operation or damaged gaskets. Future repairs should begin with identification and compatibility checks, not with an assumption that every aluminium window uses the same components.
Frequently asked questions
Can any glass pane that fits the opening be used?
No. Physical fit is only one part of compatibility. The replacement must suit the glass specification, safety requirements, frame rebate, support arrangement, retention method, gaskets, beads, sealants and project evidence requirements.
Are setting blocks just packing pieces?
No. They are system components that support and position the glass while helping control contact and movement. Their material and location should come from the approved system information, not from whatever is available on site.
Can an old gasket be reused?
Only where the approved installation method permits reuse and the gasket remains suitable. Inspect it for damage, shrinkage, contamination and loss of flexibility. When in doubt, obtain confirmation and use the specified replacement profile.
Does a sealant bead prove that the window is watertight?
No. A sealant bead is only one part of an interface. Its compatibility, preparation, continuity, curing and relationship with drainage all matter. Water performance must be assessed within the defined test and project scope.
What should happen if the replacement unit does not sit correctly?
Stop the installation and investigate the identity, measurement, frame condition, supports, clearances and retention components. Do not force the glass into position or conceal the issue with extra sealant, a substitute block or an unapproved modification.
Is a visual inspection enough for handover?
A visual and functional inspection is essential, but it may not be enough where the project requires documented safety evidence, formal performance testing, manufacturer approval or code-related records. Follow the project’s inspection and handover requirements.
Conclusion
Aluminium window glazing replacement quality is built through controlled decisions: identify the right unit, handle it without damage, prepare the frame, support the glass correctly, preserve clearances, install compatible gaskets and beads, use approved sealants, check operation, clean carefully and document the result. Water and air observations should remain within their defined boundaries, and standards such as AS 1288, AS 2047, AS 2208 and AS 4666 should be considered alongside the applicable NCC and ABCB material. In New Zealand, coordinate the work with the Building Code and relevant NZ references, including the applicable NZS 4223 provisions.
The strongest handover record is specific and honest. It identifies what was installed, what was inspected, what was tested, what evidence was retained and what remains outside the inspection scope. That discipline protects the glass, the aluminium frame and the people who will rely on the completed window.
Copyright © 2026 添先生. All rights reserved.
Related Articles
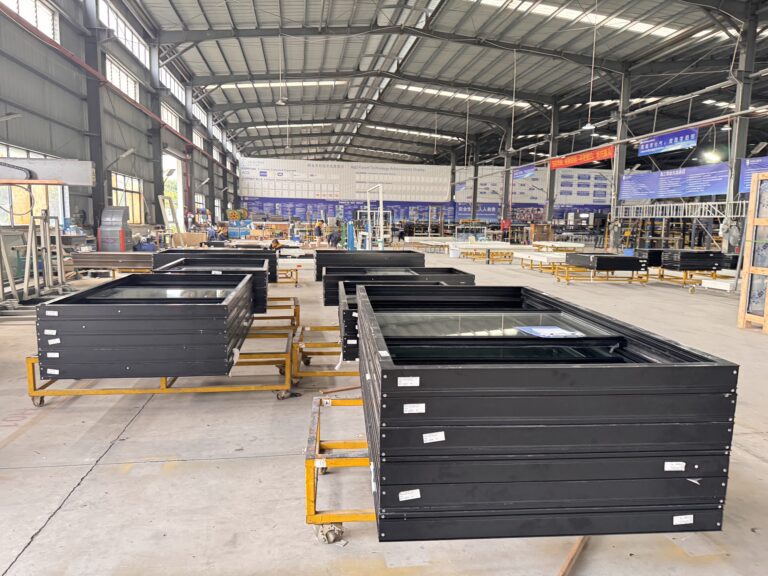
Top Aluminium Window and Door Manufacturers for Sydney Builders
For Sydney builders, selecting a reliable aluminium window and door manufacturer is crucial for ensuring…
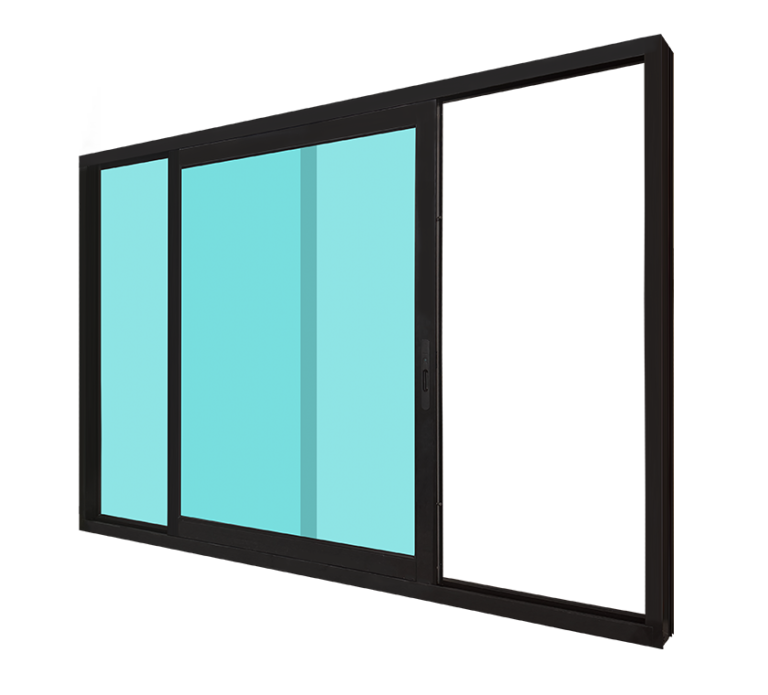
Christchurch Aluminium Sliding Windows: Perfect for Modern and Compact Spaces
Aluminium frames are lightweight yet robust, ensuring long-lasting performance and minimal maintenance. They resist rust…
Bushfire-Ready Window Design: Understanding BAL Requirements Before You Build
If you have been searching for bushfire ready windows Australia BAL requirements, you are probably…