Aluminium Window Glass Edge Clearance: Rebates, Gaskets and Thermal Movement QA
MC
Author
November 18, 2026
Published
14 min read
Reading time
Aluminium Window Glass Edge Clearance: Rebates, Gaskets and Thermal Movement QA
Aluminium windows can look simple after installation, but the space between a glass edge and its surrounding frame is a controlled part of the system. That space is not merely a visual gap. It allows the glazing unit to be supported without being pinched, gives seals room to perform, permits small movements caused by temperature and building movement, and helps prevent water from being trapped against vulnerable edges. A narrow or inconsistent clearance can create problems that appear months or years later as cracked glass, seal failure, water staining, rattling, corrosion, or difficult replacement.
This article is a quality-assurance guide for checking the relationship between glass, rebates, gaskets, setting blocks, beads, drainage paths and the aluminium frame. It is written for owners, builders, installers, inspectors and facilities teams who need a practical inspection framework without treating a general article as a project design. The required edge clearance depends on the complete assembly, including glass type, pane size, wind exposure, frame system, support arrangement, seal materials, fabrication tolerances, building movement and the applicable jurisdiction. Do not copy a generic gap into a shop drawing or use this article to approve an installation without the project documents.
What edge clearance means
Edge clearance is the designed separation between the edge of a glass pane or insulating glass unit and the hard surfaces of the frame, bead, stop, fastener or other component that could bear directly on the glass. It is considered in several directions. Face clearance concerns the space between the glass face and the frame or bead. Edge clearance concerns the space at the glass perimeter. End clearance concerns the distance between a glass end and a hard stop or pocket end. The installer must understand the terminology used by the selected glazing system because suppliers sometimes describe tolerances, bite, pocket depth and clearances differently.
The purpose is not to create an open, uncontrolled void. The purpose is to create a predictable support and sealing condition. A glass panel should sit on approved setting blocks or another documented support arrangement, remain located in the rebate, and be held by compatible gaskets or seals without direct hard contact. The clearance must remain available after the glass, blocks, gaskets, beads and packers have been installed. A measurement made before assembly is not enough if a bead later pushes the unit sideways or a gasket folds into the gap.
Visual uniformity matters, but appearance alone is not proof of compliance. A neat joint may still contain a hard point, a misplaced block, an obstructed drain or an insufficient glass bite. Conversely, a visible seal line may be acceptable if it matches the approved system details. Inspection should therefore compare the installed condition with the frame manufacturer’s glazing instructions, approved shop drawings, glass supplier requirements and project specifications rather than relying on a single visual rule.
Rebates and the glass pocket
A rebate is the part of the frame that receives and locates the glass. It normally has a base, side surfaces, a stop or bead, and a drainage arrangement. The rebate must provide enough controlled depth for the intended glass, seal and support components. It must also avoid transferring concentrated loads to the glass edge. The exact rebate dimensions belong to the tested or engineered window system and should be taken from current manufacturer documentation or project-approved details.
Before glazing, inspect the rebate for swarf, sharp burrs, dirt, hardened sealant, damaged coatings, loose fasteners and projecting corners. An aluminium shaving left in the pocket can act as a hard point. A burr can cut a gasket or damage a glass edge during insertion. Old sealant can change the seating position and block a drainage path. Cleaning should follow the frame and seal supplier’s instructions; aggressive solvents can damage coatings, gaskets or insulating glass edge seals.
Check that the rebate is square and that the frame has not been twisted by installation. A distorted opening can reduce clearance at one corner while creating an apparently generous gap at another. Record the condition before the glass is installed where possible. If a frame is out of tolerance, forcing the glass into position is not a corrective action. The frame should be reviewed by the responsible designer, manufacturer or installer before glazing continues.
The glass must have the specified seating and retention condition. Glass bite is the portion captured by the rebate and gasket or bead. Too little bite may reduce retention or weather performance; too much forced insertion may hide a hard contact or deform the seal. A glass unit should not be trimmed, ground, drilled or notched on site to make it fit unless the work is expressly permitted by the glass processor and the project design. Tempered or toughened glass generally cannot be modified after processing without replacement, and laminated or insulating units have their own fabrication limitations.
Gaskets, seals and compatible materials
Gaskets create a resilient interface between the glass and frame and contribute to air, water and retention performance. A gasket should be the specified profile, material and length for the system. It should lie continuously in its channel, meet neatly at approved joints, and remain free from twists, stretching and gaps. A gasket that is cut short can pull away from a corner. A gasket installed under excessive tension can shrink back and expose a path for water or movement. A gasket that is too thick can displace the glass and reduce edge clearance.
Inspect the gasket at corners, bead joins, drainage openings and transitions between fixed and opening sashes. Look for folds, fish mouths, flattened areas, cuts, contamination and signs that the gasket has rolled out during bead installation. Do not assume that adding sealant over a defective gasket restores the system. If a sealant is part of the approved design, confirm its compatibility with the glass edge seal, coatings, aluminium finish, gasket material and any setting or backing material.
Neutral-cure silicone, compatible glazing sealants and other products must be selected for the actual assembly. Product names that sound similar can have different adhesion, curing and chemical compatibility properties. The installer should retain technical data and batch information where required by the project quality plan. A sealant bead should not be used to conceal a missing block, a crushed gasket or an incorrectly located pane.
For insulating glass units, protect the perimeter seal and do not puncture, abrade or expose it to unapproved chemicals. The edge seal is part of the moisture and gas-control system. A frame detail that allows persistent water to sit against the unit edge can shorten service life even when the visible room-side seal looks intact. Any condensation, fogging between panes or edge deterioration should be assessed by the glass supplier rather than dismissed as a cosmetic issue.
Setting blocks and load transfer
Setting blocks carry the glass at designated support points and transfer weight into the frame. They also help maintain the intended position while the glass is being retained. Blocks must be the type, size, hardness and location specified for the system and glass. The article does not prescribe generic block dimensions or locations because those depend on pane geometry, glass construction, loads, frame design and manufacturer instructions.
During inspection, confirm that blocks are present, stable, correctly oriented and seated on a suitable surface. They should not bridge a drainage path unless the approved detail expressly allows it. They should not be replaced with timber offcuts, cardboard, unapproved rubber, metal shims or random packers. A substitute can react differently under load, absorb water, stain the glass edge or create a hard contact. Blocks should not be so close to the glass corner that they introduce a concentrated stress, and they should not be so far from the intended support zone that the glass sags or rotates.
Look for rocking, displaced blocks, bruised glass edges and evidence that the unit has been lifted or dragged across the rebate. If the glass has been forced down onto a block, the unit may have a local pressure point even if no crack is visible. A small chip or shell at the edge can become a fracture origin when the pane experiences thermal or wind stress. Photograph and record any edge damage before the pane is accepted.
Setting blocks do not replace edge clearance. They support the pane in the approved orientation, while the designed clearance allows the pane and frame to accommodate movement without hard contact. Both conditions must be checked together. A correctly located block cannot compensate for a bead screw that touches the glass, and a visually even perimeter gap cannot compensate for missing support.
Glass movement and thermal movement
Glass and aluminium respond to temperature changes, solar exposure, wind pressure and building movement. They do not necessarily expand, contract or deflect at the same rate. A dark frame, a shaded frame, a partially covered pane and an exposed pane can have different temperature patterns. Heat from adjacent materials, blinds, films or internal heating can also create uneven conditions. The resulting movement is one reason why glass should not be locked against hard surfaces.
Thermal movement should be considered at the design stage and checked during installation. An insulating glass unit can experience movement of its panes and edge seals as pressure and temperature change. A large pane can deflect under wind load while the frame deflects differently. If the clearance is consumed by a hard stop, displaced gasket, proud screw or incorrectly positioned packer, normal movement may become contact stress. Repeated contact can chip the edge or initiate a crack without an obvious impact event.
Thermal stress can also arise from temperature differences across one pane. Partial shading by an overhang, nearby wall, sign, curtain, furniture or applied film may leave one area hotter than another. Heat-absorbing glass, reflective coatings and changes in adjacent surfaces can alter the risk profile. The correct response is not to declare a pane safe or unsafe from appearance alone. Ask the designer or glass supplier to assess the actual glass specification, exposure and shading conditions. Where required, the assessment should address whether heat treatment or a different glass construction is appropriate.
After installation, check for contact marks, polished lines, chipped edges, compressed gasket sections and movement of the pane toward one side. These are clues, not diagnoses. A pane that has moved may reflect a frame distortion, missing block, installation sequence problem or a design tolerance issue. Record the location, weather conditions and surrounding shading when a thermal or movement concern is reported.
Drainage, ventilation and moisture control
Many aluminium window systems are designed to manage water in stages. Water may pass the external seal, enter a glazing pocket, move through weep paths and discharge to the exterior. The drainage route must remain open from the rebate to the approved outlet. Do not block weep holes with sealant, tape, gasket ends, paint, debris, packers or insulation. Do not add an unapproved sealant bead across a drain because it appears to improve the visual finish.
Inspect the sill and rebate before and after glazing. Confirm that holes and channels are open, that the frame has the required fall or drainage geometry where specified, and that the installation does not create a ponding point. Check the external sill, corner joints, end dams, transoms and intersections with adjacent cladding. A blocked internal route can cause water to remain against the glass edge or migrate into the building. A blocked external outlet can make a sound glazing detail appear to leak.
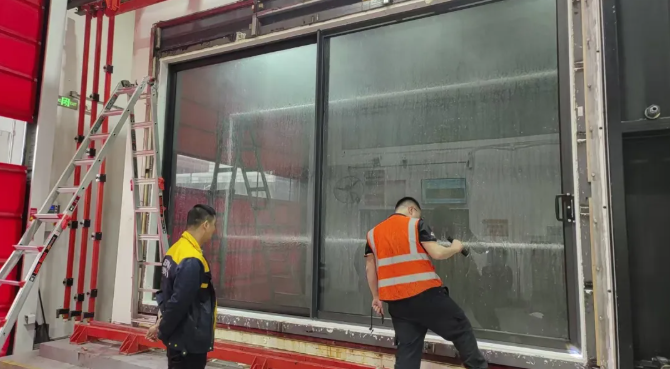
Drainage is connected to ventilation in some systems, especially where moisture must be managed around a sealed or drained pocket. The installer should follow the system’s approved detail and should not seal a cavity that is intended to drain or equalise pressure. Water testing, if specified, should be performed by an appropriately competent person using the project method. A hose directed at random joints is not a substitute for a documented test method and does not prove that all weatherproofing requirements have been met.
Replacement glazing and repair decisions
Replacement work should begin with identification of the existing frame and the cause of the failure. Record the frame series if known, opening type, glass markings, pane construction, thickness information available from markings or records, gasket profile, bead arrangement, drainage configuration and observed damage. Do not assume that a new pane with the same visible size is a suitable replacement. The replacement must fit the rebate while preserving support, retention, clearance, drainage, ventilation and safety requirements.
Remove the damaged glass using a controlled method that protects workers and adjacent finishes. Plan for fragments, temporary weather protection and safe storage. Do not lever against a vulnerable aluminium edge, drill a pane without approval or leave loose fragments in a drained pocket. Once the pane is out, inspect the rebate, blocks, gaskets, beads, fasteners and drainage route. A cracked pane may be the symptom of a hard point or failed support, so replacing only the glass can repeat the failure.
For insulating glass, confirm the replacement unit’s overall construction and edge details with the processor. For laminated, toughened, coated or patterned glass, confirm the orientation and markings. The replacement should be traceable to the relevant order, drawing or supplier record. If the original glass cannot be identified, pause and obtain a documented assessment. Guessing from colour or thickness can lead to an unsuitable or unsafe result.
After replacement, check that the pane is supported without rocking, that the gaskets are seated, that the bead is secure, that the drains remain open and that no tool or fastener has created hard contact. Clean labels and markings only in accordance with the glass supplier’s instructions. A final inspection should record the glass identification where available, installation date, installer, defects noted, corrective actions and any maintenance restrictions.
Safety glazing and human impact risk
Safety glazing is selected for locations where human impact, fall-through or other hazards may exist. The assessment depends on the opening, visibility, height, access, door or window operation, adjacent circulation and the building’s use. Do not decide that ordinary annealed glass is acceptable simply because it has survived previous use. Conversely, do not specify a product solely by a trade name without confirming its relevant performance and marking.
Use the applicable safety glazing requirements and the project risk assessment. In Australia, AS 1288 covers glass in buildings, including selection and installation considerations, while AS 2208 addresses safety glazing materials for use in buildings. The National Construction Code and Australian Building Codes Board material should be consulted for the adopted building provisions and referenced requirements in the relevant jurisdiction. These sources do not remove the need to examine the actual opening and installation detail.
Look for permanent or durable safety markings where required, and compare the marking with the approved glass schedule. A missing mark is a verification issue, not automatic proof that the glass is unsafe; a mark is also not automatic proof that the entire installation is correct. Check the glass type, location and orientation. Pay particular attention to doors, sidelights, low-level glazing, glazing near stairs, circulation paths and areas where a person could fall against or through the pane.
In New Zealand, consult the applicable New Zealand Building Code provisions, Acceptable Solutions and Verification Methods, together with current guidance associated with safety glazing and hazardous locations. NZS 4223 and relevant Building Performance guidance may be applicable depending on the glass and installation. WorkSafe New Zealand information should also be considered for workplace risks, handling and temporary protection. Confirm the current edition and project applicability rather than assuming that an Australian reference can be substituted without review.
Inspection sequence for quality assurance
1. Review documents before touching the installation
Collect the window schedule, glass schedule, approved shop drawings, system details, manufacturer glazing instructions, sealant data, installation method, inspection and test plan, and any engineering or thermal assessment. Confirm the project location and governing provisions. For Australian work, review the adopted National Construction Code provisions and relevant ABCB material, AS 1288, AS 2208, AS 2047 and AS 4666 as applicable to the scope. AS 2047 concerns windows and external glazed doors, while AS 4666 concerns resistance to the penetration of embers for relevant building elements and applications. The exact references must be checked against the project and current editions.
2. Inspect the frame and rebate
Check alignment, squareness, distortion, damage, coating condition, burrs, debris, fasteners and the condition of the pocket. Confirm that the system matches the approved product and that the rebate is prepared for the specified glass and seals. Record measurements only as part of the project method; do not invent a pass limit from a general article.
3. Inspect supports and clearances
Confirm approved setting blocks, their locations and their stability. Check for hard contact at edges, corners, beads, screws and packers. Check the clearance around the perimeter after the glass is positioned and retained. Use suitable non-damaging inspection tools and follow the installer’s method. If access prevents inspection, record the limitation rather than marking the condition as compliant.
4. Inspect gaskets, beads and sealant
Check continuity, profile, joints, corners, compression and compatibility. Confirm that beads are secured without forcing the glass against the frame. Inspect sealant for adhesion, tooling, gaps, contamination and unintended blockage of drainage. Aesthetic neatness is secondary to the specified function, but excessive sealant and rough joints can still indicate workmanship or compatibility concerns.
5. Inspect drainage and water management
Verify that drains, channels and external outlets are open and connected to the intended path. Check sill interfaces, corners, transoms and adjacent membranes. If the project requires water testing, record the method, location, duration, weather conditions and result. Do not infer performance from a dry day or from one successful check at a different window.
6. Inspect glass condition and identification
View each pane under suitable lighting for cracks, chips, scratches, edge damage, distortion and contamination. Check safety markings and glass identification against the schedule where available. Examine both accessible faces and the perimeter. A defect that is difficult to see from a distance should be documented with a close image, location and description.
Handover records and maintenance
A useful handover package explains what was installed, what was inspected and what remains conditional. Include the final window and glass schedule, approved product information, supplier and installer contacts, cleaning instructions, sealant and gasket care instructions, safety glazing records, test reports, non-conformance records, approved variations and photographs of concealed work where available. State any areas that could not be inspected and the action required.
Explain that owners should not attach films, blinds, signs, fixtures or coatings near glass without checking compatibility and thermal impact. Do not drill, screw or clamp into a glazing bead or frame without approval. Keep sill drains clear of dirt, paint and landscaping materials. During routine maintenance, look for cracked or chipped glass, gasket shrinkage, failed sealant, water staining, corrosion, loose beads, rattling, fogging between insulating glass panes and doors or sashes that no longer close evenly.
Maintenance personnel should report changes rather than attempting an improvised repair. A temporary barrier may be needed where a pane is cracked or at risk of falling. Broken glass should be isolated and removed using appropriate procedures. The responsible contractor, glazier, building surveyor, engineer or system supplier should determine the repair method, especially where the pane is safety glazing, laminated, toughened, fire-related, acoustic, energy-related or part of a weather-exposed façade.
Reference framework and source labels
[Source: NCC/ABCB] Use the adopted National Construction Code and Australian Building Codes Board guidance to identify building performance provisions, referenced documents and evidence requirements applicable to the project. Check the edition, state or territory variations and the building classification. Do not treat a summary article as a substitute for the adopted provisions.
[Source: AS 1288] Consult the current Australian Standard for glass in buildings when selecting, locating and installing glass. Apply its provisions to the actual pane, frame, hazard and building condition; do not extract one generic clearance or safety rule without checking the complete context.
[Source: AS 2208] Use the current standard for safety glazing materials where applicable. Confirm product marking, type, processing and evidence through the manufacturer or processor. Product appearance alone is not sufficient evidence.
[Source: AS 2047] Consider the current window and external glazed door standard for relevant product performance and installation requirements. Confirm that the selected system, testing evidence and installation details relate to the actual product and exposure.
[Source: AS 4666] Where ember exposure and construction requirements are relevant, consult the current standard and associated NCC provisions. Confirm the exact element, material and exposure classification instead of assuming every aluminium window has the same ember performance.
[Source: New Zealand Building Code and MBIE guidance] For New Zealand projects, check the current Building Code clauses, Acceptable Solutions and Verification Methods relevant to structure, durability, external moisture, safety and glazing. E2 external moisture guidance may be relevant to drained and weather-exposed window interfaces, while other clauses may apply according to the building and work.
[Source: NZS 4223 and New Zealand safety guidance] Review the current applicable parts of the NZS 4223 glazing series and related guidance for glass selection and installation. Consult WorkSafe New Zealand material for worker protection, handling, temporary barriers and workplace risk controls. Confirm the scope and current status of every document before relying on it.
Frequently asked questions
Is a larger edge gap always safer?
No. Clearance is part of a designed system. Excessive clearance may reduce retention, expose seals, permit movement beyond the intended condition or affect water and air performance. Insufficient clearance may cause hard contact and stress. The correct condition is the one supported by the approved system and project requirements, not the largest gap that can be seen.
Can sealant fill an edge clearance problem?
Usually, sealant should not be used as a substitute for a missing setting block, an incorrect rebate, a distorted frame or inadequate clearance. If sealant is part of the approved glazing detail, it must be compatible and installed in the specified location. A corrective sealant bead should be authorised by the responsible party and documented.
Why can a pane crack without being hit?
Possible causes include edge damage, hard contact, thermal stress, excessive frame movement, incorrect support, manufacturing defects or a combination of factors. The crack pattern and site history may provide clues, but they do not prove a cause by themselves. Preserve evidence, photograph the pane and request an assessment where the cause affects replacement or liability.
Can an existing pane be reused after a frame is repaired?
Only after confirming that the pane remains suitable and undamaged and that the repaired frame can provide the specified support, retention, clearance and drainage. A pane may have hidden edge damage or may no longer match the revised frame detail. Reuse should be approved by the responsible glazier, designer or supplier.
Does a safety mark prove the window is compliant?
No. A safety mark can support identification of the glass product, but the opening, location, installation, retention, clearance and surrounding hazard must also be assessed. The required evidence depends on the project and jurisdiction.
What should an inspector do when the clearance cannot be seen?
Record the limitation and use the approved inspection method, which may include inspection before bead installation, controlled removal of a component by the responsible installer, records from fabrication, or other documented evidence. Do not mark a concealed condition as accepted solely because the visible face looks even.
Are Australian and New Zealand references interchangeable?
No. They may address similar concerns, but legal adoption, terminology, climate exposure, building classifications, referenced standards and evidence pathways differ. Identify the project jurisdiction first and obtain current, applicable documents. Use cross-border information only as background unless the responsible authority or designer confirms its relevance.
Conclusion
Glass edge clearance is a small-looking detail with system-wide consequences. Reliable results come from coordinating the rebate, glass construction, gaskets, setting blocks, beads, sealants, drainage paths and frame movement rather than checking one visible gap in isolation. Good quality assurance begins with current project documents, continues with careful inspection of the frame and support condition, and ends with records that allow future owners and maintainers to understand what was installed.
Use the NCC and ABCB material, applicable Australian Standards, New Zealand Building Code resources and current manufacturer instructions as source documents for the actual project. Where a condition is uncertain, stop before forcing, drilling, trimming, sealing or replacing the glass. Obtain a documented review from the appropriate designer, engineer, glazier, building surveyor or system supplier. This disciplined approach helps protect glass edges, manage thermal movement, preserve drainage and support a safer, more maintainable handover without making unsupported compliance promises.
Copyright © 2026 添先生. All rights reserved.
Related Articles
Meichen High Tech Industries: Dual-Brand Strategy & 40+ Certifications Unlock Australian & New Zealand Door & Window Markets
In the dynamic land of innovation and entrepreneurship that is Zhaoqing High-Tech Zone, a company…

Which Chinese AS2047 Window Factories Are Worth Recommending? Why More Developers Prefer M&C Windows & Doors
In recent years, the Australian construction market has set higher and higher requirements for window…

Canberra Aluminium Louver Windows: Efficient and Stylish Ventilation
The aluminium frames are lightweight, durable, and corrosion-resistant, making louver windows an ideal option for…