Aluminium Door Weather-Seal Replacement: Gaskets, Compression and Water Management
MC
Author
2026-11-12
Published
14 min read
Reading time
Aluminium Door Weather-Seal Replacement: Gaskets, Compression and Water Management
Replacing a weather seal is not simply a matter of pulling out an old strip and pushing in a new one. An aluminium door works as a coordinated system: the frame, sash or panel, glass, hardware, seals, drainage chambers and surrounding wall must work together. A replacement seal that looks similar may have the wrong base, bulb, fin, pile, flexibility or compression behaviour. It can make the door difficult to close, leave a wind path, block a drainage route, or move water towards the interior instead of away from it. The right repair begins with diagnosis, identification of the door type and confirmation of the compatible replacement part.
This guide explains the practical principles behind aluminium door weather-seal replacement. It covers hinged, sliding and bi-fold systems, including the different work performed by gaskets, compression seals, brush seals, interlocks, jamb seals, head seals and threshold details. It also explains how to inspect drainage, how to manage coastal exposure, how far adjustment can safely go, and how to commission the finished door. The guidance is deliberately general. It does not invent dimensions, prices, U-values, acoustic values, ratings, certifications or guarantees. Product-specific instructions, tested configurations and the requirements of the project must always take priority.
What a Weather Seal Does
A weather seal forms a controlled contact or overlap between moving and fixed parts. Its purpose may include reducing air movement, limiting wind-driven rain, cushioning contact, controlling dust, improving light exclusion, reducing rattling and helping the door operate quietly. No single seal performs every one of these functions. A gasket around glass is different from a perimeter compression seal, and a brush seal in a sliding track is different from an interlock seal between two meeting panels.
Seals also divide the door into pressure and drainage zones. Rain that passes the outer seal is not necessarily evidence of a defective door if the water remains within a designed drainage chamber and exits through clear weep paths. The important question is whether water is being managed as the system intended. Replacing a seal with a solid strip that covers a drain, or sealing over a designed opening, can turn a manageable amount of water into concealed leakage.
Gaskets and Glazing Seals
A glazing gasket holds the glass in its rebate while providing a resilient line between glass and aluminium. Some systems use a wedge gasket, some use a push-in gasket, and some use a seal installed during fabrication. The replacement must match the profile and the glazing arrangement. The glass thickness, rebate geometry, corner treatment and gasket channel all matter. A gasket that is too hard may fail to maintain contact; one that is too soft or too large may distort, twist or prevent the bead from seating.
Never treat a glazing gasket as a generic strip based only on its visible width. Record where it came from, how it was retained, whether the gasket has a locking leg or wedge, and whether corners are joined, cut or moulded. If the glass is cracked, unsupported, incorrectly packed or showing signs of movement, seal replacement alone is not an adequate repair. Glazing work should be assessed against AS 1288 and the instructions for the specific system.
Compression Seals
A compression seal is designed to be pressed between the door leaf and the frame, usually at a perimeter or at a meeting joint. It needs enough contact to close the weather path, but not so much that the handle, hinges, rollers or locking points are overloaded. A seal that is permanently flattened may have lost resilience. A seal that is pulled tight around a corner may shrink back and open a gap later.
Compression is a relationship between the seal and the closing geometry, not a target that can be achieved by force. If the door closes only when the handle is lifted aggressively or the lock is forced, the cause may be sag, frame movement, incorrect hardware adjustment, debris, a swollen or distorted seal, or an opening that is out of alignment. Increasing seal size is not a substitute for correcting those conditions.
Brush Seals
Brush seals use flexible pile carried in a backing strip. They are common on sliding doors, particularly where a panel must move past a fixed jamb or another panel. They can reduce air movement and help limit dust while allowing movement with relatively low friction. The pile must meet the opposing surface without being crushed so heavily that the door drags. A brush seal also needs a clean, continuous carrier; a loose backing or cut pile can become a snag point.
Brush seals are not a drainage plug. Water still needs a route through the sill and track assembly. Do not bridge sill slots, weep holes or track outlets with adhesive, sealant or a replacement carrier unless the system documentation specifically requires it. If a sliding door has a brush seal and a separate compression seal, identify the role of each before removal.
Identify the Door System Before Ordering Parts
Correct identification prevents most failed seal replacements. Photograph the complete door, each corner, the lock side, the hinge or roller area, the meeting stile and the threshold. Record the manufacturer or system mark if visible, the approximate age, the number of panels and the direction of movement. Do not rely on colour alone. Black, grey and white seals can share a colour while having entirely different carriers and profiles.
Hinged Aluminium Doors
A hinged door normally has a fixed frame with head and jambs, a moving leaf, hinges on one side and a latch or lock on the other. Its perimeter seal is commonly a compression seal fitted to the frame or leaf. The hinge jamb, lock jamb, head and threshold may each have different contact conditions. A seal may be continuous on three sides but use a separate threshold or sweep at the bottom.
Check whether the door is single-action, double-action or part of a glazed entrance system. Check the hinge type and adjustment range before changing seals. A heavier or deeper seal can alter the closing position and may make the lock appear misaligned. If the leaf has dropped, the new seal may be blamed for a problem that was already present.
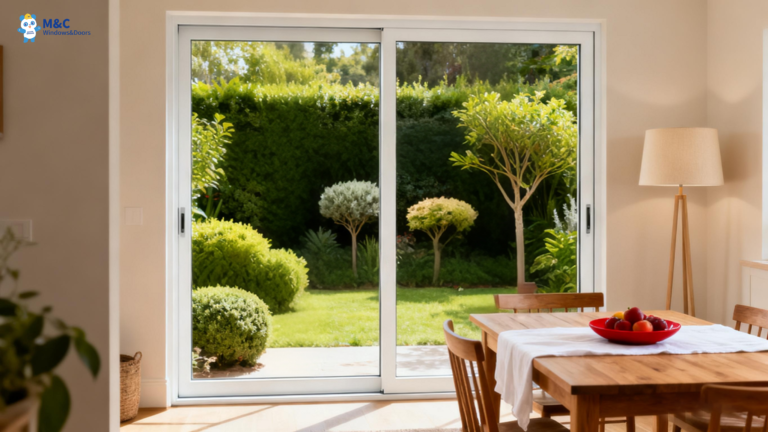
Sliding Aluminium Doors
A sliding door moves on rollers along a sill track. It usually relies on a combination of pile or brush seals, interlock seals at the meeting stiles, seals at the fixed jambs and carefully arranged drainage in the sill. The panel should move without lifting, scraping or striking the frame. The rollers set the panel height and alignment, while the seals influence resistance and contact.
Sliding systems are sensitive to dirt. Fine grit in the track can damage rollers, change the panel position and create an apparent seal gap. Before replacing a brush seal, clean the track and inspect the rollers. A new seal cannot correct a panel that is leaning, a damaged interlock, a loose fixed panel or a distorted sill.
Bi-Fold Aluminium Doors
A bi-fold door combines hinged leaves with a running or guiding arrangement. Several leaves fold and stack, so seal contact varies between the outer jambs, intermediate meeting stiles, head, sill and folding joints. Some seals are installed on the perimeter frame, while others are fitted to the panel edges or interlocks. The adjustment sequence is therefore important: a change to one panel can affect the alignment of the whole group.
Identify the lead leaf, the traffic leaf, the top or bottom running arrangement and the locking points. Do not remove multiple seals at once without marking their locations. Folding leaves must be supported as the manufacturer directs. If the panel weight is no longer properly carried, forcing the handles or changing seal size can worsen hardware damage.
Jambs, Heads, Thresholds and Interlocks
Jamb Seals
Jambs are the vertical sides of a door opening. On a hinged door, the hinge jamb may compress differently from the lock jamb. On a sliding or bi-fold door, the outer jamb may use pile, a fin seal or a compression arrangement. Inspect each side with the door closed and open. Look for gaps at the top and bottom of the vertical seal, crushed corners, missing clips, adhesive residue and a carrier that has pulled out of its channel.
At a jamb, the seal should terminate in a way that does not create an open water path into the wall or sill. Avoid leaving a sharp cut that can catch a moving panel. Where the system uses a corner join, follow the original joint method rather than improvising a bulky overlap.
Head Seals
The head is the horizontal top member. Its weather seal may be a compression seal on a hinged leaf or a brush and frame seal on a sliding or bi-fold system. Head seals can be overlooked because water typically travels downwards, yet wind pressure can drive air and rain through the top joint. A seal that is sagging, twisted or interrupted near a corner can create a persistent draft.
Keep the head drainage and pressure-equalisation features clear. Do not pack the top channel with sealant because it appears to close a gap. If the head has a separate cover, bead or retainer, refit it in the same sequence and orientation.
Thresholds and Sills
The threshold is the most important water-management zone because it receives water from above and sits beside the interior floor. A threshold may include a sill track, drainage chamber, weep openings, a ramp or sill cover, a door sweep and a transition to the finished floor. The correct replacement seal must not reduce the designed clearance or cover a drainage opening.
Inspect the threshold for blocked weeps, failed end caps, loose track components, ponding, corrosion, cracked sealant and a floor finish that has been raised against the door. Clean openings with a soft brush or suitable non-damaging method. Do not drill new holes or enlarge existing holes without system-specific engineering or manufacturer instruction. Uncontrolled openings can admit insects, water and wind, and may change how the sill drains.
Interlocks
An interlock is the meeting arrangement where two sliding or folding panels overlap or engage. It often contains a pile seal, fin, gasket or magnetic-style contact, depending on the system. The interlock must line up along its height. A gap at one end may indicate roller adjustment, a bowed panel, a loose stile or a worn carrier rather than a seal-only problem.
Check the interlock with the panels fully closed and latched, then inspect the engagement while opening slowly. The seal should not snag, fold outward or be pushed out of its channel. Confirm that the lock engages without excessive force. If the interlock is damaged or its profile is unknown, use a verified system part rather than trimming a generic strip until it appears to fit.
Diagnosis Before Removal
Start with a dry inspection. Close and lock the door normally. Look for daylight, movement, uneven contact, seal shrinkage, gaps at corners and evidence that the seal has been painted, glued or compressed beyond recovery. Use a thin, non-abrasive strip of paper only as an indicative contact check; do not treat resistance as a certified air-leakage test. Listen for rattling and note whether the noise changes when pressure is applied to a panel.
Then inspect the exterior. Look for water marks below the sill, staining at jambs, blocked drainage, failed sealant at the frame-to-wall junction and water that has tracked along the threshold. Distinguish door leakage from wall leakage. Water entering above the opening may travel inside the reveal and emerge at the door, making the seal appear responsible when the actual defect is flashing, cladding or a wall junction.
A controlled water check can help locate a visible path, but it should be gentle and systematic. Begin at the lowest-risk area and observe the interior side. Do not use a pressure washer or direct a strong jet into drainage openings. Stop if water reaches finishes or concealed cavities. On commercial, high-rise, exposed or regulated work, use an appropriately qualified professional and the relevant test method rather than an informal hose test.
Compatible Replacement Parts
Compatibility means more than matching a measured strip. Confirm the system, seal location, carrier shape, material, flexibility, corner method and interaction with adjacent parts. Retain a short sample of the removed seal and label its location. Compare the replacement against the sample and channel before cutting a full length.
Ask for system documentation, an installation drawing or a part reference where available. A reputable supplier should be able to explain whether a seal is intended for a frame, sash, panel edge, glazing rebate, interlock or threshold. If the door is in a coastal location, confirm suitability for the exposure and check that any metal carrier, fastener or retainer is compatible with the surrounding materials. Avoid mixing sealants and tapes without checking chemical compatibility; some products can soften, stain or attack seal materials.
Installation Sequence
Prepare and Document
Read the door system instructions and establish a safe work area. Protect glass and finished floors. Photograph the original installation, including overlaps and corners. Mark the old seal location with removable labels. Have the replacement, compatible cleaning materials, suitable cutting tools and any specified corner accessories ready before removal.
Remove the Old Seal Carefully
Remove the seal in manageable sections. Pull from the carrier rather than levering against glass or painted aluminium. If adhesive is present, soften or remove residue using a method approved for the finish and seal material. Do not use a sharp blade near glass edges, gaskets, coatings or drainage slots. On a bi-fold door, support panels and avoid disturbing hardware that has not been diagnosed.
Clean and Inspect the Channel
Vacuum or brush out dust, old adhesive and fragments. Inspect the channel for cracks, deformation, corrosion, burrs and missing retainers. Confirm that weep paths remain open and that the seal channel is not carrying hidden water. Repair or refer damaged aluminium, loose glass, failed hardware or structural movement before installing a new seal.
Fit Without Stretching
Measure each run against the system instruction and allow the specified treatment at corners. Many flexible seals should be fitted without stretching because they can shrink back after installation. Feed the carrier evenly into the channel and avoid twisting the seal. At corners, form the profile as intended; do not force a tight radius that lifts the seal from the channel.
Where a seal is joined, keep the join away from a vulnerable corner unless the system detail requires otherwise. Use the specified corner piece, adhesive or joint method. A blob of general-purpose sealant is not automatically a durable joint and may obstruct drainage or prevent future replacement.
Reassemble and Operate
Refit beads, covers and retainers in their original order. Close the door gently several times. For hinged doors, check hinges, latch, lock and handle operation. For sliding doors, check roller height, panel alignment, interlock engagement and track movement. For bi-fold doors, fold and unfold the complete set, checking that each leaf clears the next and that locking points engage in sequence.
Adjustment Limits and When to Stop
Adjustment is intended to restore the designed relationship between panels, frame and seals. It is not intended to force an opening into a new geometry. Make small, recorded changes and test after each one. If a roller or hinge adjustment reaches its limit, the panel remains out of square, or the lock still requires force, stop and investigate the underlying cause.
Do not remove seal material to make a door close when the problem may be sag, a damaged hinge, a failed roller, settlement, movement in the opening or a distorted frame. Do not add packers under a threshold or grind aluminium without a system-specific reason. Excessive compression can increase operating force, reduce hardware life and distort the seal. A door that closes only when slammed is not commissioned successfully.
Water Management and Drainage
Every replacement should include a drainage check. Trace the intended path from the outer face, through any drainage chamber, to the exterior discharge. Remove debris without damaging baffles or internal bridges. Check end caps and sill corners. Make sure the replacement seal does not sit across a weep, and do not fill a drainage opening with sealant because it appears untidy.
At the wall interface, inspect the perimeter sealant separately from the door seal. The frame-to-wall junction may require backing material, a bond breaker, a membrane connection or a specified sealant joint. That interface should not be casually altered during weather-seal replacement. If the wall junction is leaking, refer it for assessment rather than hiding it with a new bead around the visible frame.
Coastal Exposure
Salt-laden air increases the maintenance burden on aluminium doors, hardware, carriers and drainage openings. Coastal exposure does not automatically mean that every seal is unsuitable, but it does require careful selection and regular cleaning. Salt deposits can make pile stiff, retain moisture, promote corrosion at dissimilar materials and obstruct small outlets. Use the cleaning method specified for the system finish and avoid abrasive pads or harsh chemicals.
Inspect corners, screw heads, rollers, hinges, handles, interlocks and threshold channels. Look for white deposits, pitting, red or dark corrosion products, swollen seal carriers and deposits that bridge a drainage path. Replace corroded or degraded components as a coordinated repair. A new weather seal cannot restore a damaged roller, corroded fastener or compromised sill.
Maintenance After Replacement
Keep tracks, sills, jamb channels and drainage openings free from leaves, grit, insects and construction residue. Wash exposed surfaces with a mild method suitable for the finish, rinse away salt and dry or allow the assembly to drain. Do not lubricate pile or rubber seals unless the manufacturer permits it. Use only the specified lubricant on rollers, hinges and locks, because an incompatible product can attract grit or affect seal materials.
Inspect seals at routine intervals and after severe weather. Look for shrinkage, splits, loss of flexibility, pulled corners, detached carriers and permanent flattening. Check whether the door still latches and locks without force. Record the location and date of any replacement so future repairs can use the correct part. In shared buildings, give occupants simple instructions: do not wedge panels, do not block weeps, do not drag heavy objects across tracks and report a leak before finishes are damaged.
Commissioning Checklist
Commissioning confirms that the repair works as a complete door system. First, verify that the correct replacement profile was used in every marked location. Second, check that all carriers, corners, joints, beads and retainers are seated. Third, operate the door through its full normal cycle without force. Fourth, confirm that locks, latches, restrictors and safety hardware work as intended. Fifth, inspect the closed seal line for continuous contact or overlap without excessive compression.
Next, check the threshold, sill and drainage openings. Confirm that water can leave the exterior side and that no new seal, tape or sealant has blocked a designed route. Inspect the wall perimeter for accidental damage. Complete a controlled water observation where appropriate to the project, and record the conditions and result rather than claiming a performance rating. If the door forms part of a regulated facade, keep the product identification, installation records and any test or inspection documentation required by the project team.
Standards, Code and New Zealand Guidance
In Australia, the National Construction Code is administered by the Australian Building Codes Board, commonly referred to as the ABCB. The NCC sets the performance framework and may reference standards for windows, doors, glazing, weatherproofing, safety and energy efficiency. AS 2047 is relevant to the performance of windows and external glazed doors in the configurations and scope covered by that standard. AS 1288 addresses glass selection and installation, including safety considerations that can be relevant when a seal or glazing component is disturbed. AS 4666 is associated with the assessment of termite management systems and should not be confused with a door weather-seal standard; project teams should confirm whether it is relevant to the building and detail being worked on.
References to AS 2047, AS 1288 and AS 4666 do not create a certification claim for a replacement seal or a complete door. Compliance depends on the product, configuration, installation, exposure and applicable edition. The ABCB Housing Provisions and the relevant NCC volume should be checked for the building classification and work scope. Where a door is part of a larger facade or a performance solution, follow the project specification and the certifier’s evidence requirements.
In New Zealand, confirm the applicable Building Code clauses, Acceptable Solutions, Verification Methods and manufacturer documentation. NZ guidance commonly requires careful coordination of external moisture control, openings, flashing, drainage, glazing safety, durability and installation. Check the current publications from the Ministry of Business, Innovation and Employment and the relevant New Zealand Standards for the project. A general seal replacement article cannot replace a site-specific assessment, producer statement, test report or building consent requirement.
Frequently Asked Questions
Can any rubber strip replace an aluminium door weather seal?
No. The replacement must fit the channel or rebate, provide the intended contact or overlap, tolerate the movement and remain compatible with adjacent materials. A generic strip may look close while having the wrong carrier, hardness, height or corner behaviour.
Why is the door harder to close after the seal was replaced?
The new seal may be too large, twisted, stretched, incorrectly seated or incompatible. The door may also be out of alignment, have damaged hardware or require a small system adjustment. Do not keep increasing force. Check the seal location and the underlying geometry.
Should drainage holes be sealed to stop water?
No. Designed drainage openings must remain open unless the system documentation specifically directs another treatment. Water management normally depends on controlled drainage, not on filling every opening with sealant.
Does a new seal fix a leaking threshold?
It may help if the old seal was the diagnosed cause, but leakage can also result from blocked weeps, failed end caps, damaged tracks, incorrect panel alignment, a wall-interface defect or water entering from above. Diagnose the whole path before replacing parts.
Are hinged, sliding and bi-fold seals interchangeable?
Usually not. Their movements and contact conditions differ. Hinged doors commonly use compression at a perimeter, sliding doors often use pile and interlocks, and bi-folds combine several moving relationships. Use the seal specified for the particular system and location.
How should a coastal door be maintained after replacement?
Keep seals, tracks and drainage clean, rinse salt deposits using an approved cleaning method, inspect hardware and carriers, and respond promptly to corrosion or loss of flexibility. Follow the system and finish-care instructions rather than using abrasive or aggressive chemicals.
When should a professional inspect the door?
Seek qualified assistance when glass is damaged, the frame is distorted, water reaches concealed construction, hardware is at its adjustment limit, the opening is in a high or exposed building, the door is part of a regulated facade, or the correct replacement part cannot be verified.
Conclusion
Successful aluminium door weather-seal replacement is a coordinated repair, not a cosmetic strip change. Identify the door system, understand the role of each gasket, compression seal, brush seal and interlock, and inspect jambs, heads, thresholds and drainage before ordering parts. Fit compatible components without stretching or forcing them, stay within the adjustment limits, and commission the door through normal operation and water-management checks. Hinged, sliding and bi-fold systems need different reasoning, especially at meeting stiles, folding joints and thresholds. In Australia, coordinate the work with the NCC, ABCB guidance, AS 2047, AS 1288 and any genuinely relevant standard such as AS 4666; in New Zealand, confirm the current Building Code pathway and relevant guidance. Keep records, maintain coastal installations carefully and refer unresolved movement, glazing, structural or moisture defects to a qualified professional.
Copyright © 2026 添先生. All rights reserved.
Related Articles

Aluminium Sliding Door Adelaide: Elegant and Functional Solution for Your Home
The durable aluminium frame ensures that the doors can withstand harsh weather conditions, from scorching…
Achieving 7-Star Energy Ratings: A Homeowner’s Guide to NCC 2022 and 2025 Compliance
For homeowners in Australia building or renovating a house, energy efficiency is no longer an…
Looking for an Energy-Efficient + High-Transparency Sunroom in Australia? Here’s the Factory We Recommend
Looking for an Energy-Efficient + High-Transparency Sunroom in Australia? Here’s the Factory We Recommend In…